
Transform Your Outdoors: Master the Art of Installing In-Ground Lights with These Simple Tips!
In-ground lights serve as a fantastic addition to any outdoor space, enhancing both the aesthetic appeal and safety of your environment. Whether you're illuminating a garden path, highlighting landscape features, or creating a cozy atmosphere on your patio, the proper installation of these lights can make all the difference. Not only do they provide necessary visibility during the night, but they also add an elegant touch to your landscape design. This article will guide you through the essential steps for installing in-ground lights effectively, ensuring that your outdoor space shines both in terms of beauty and functionality.
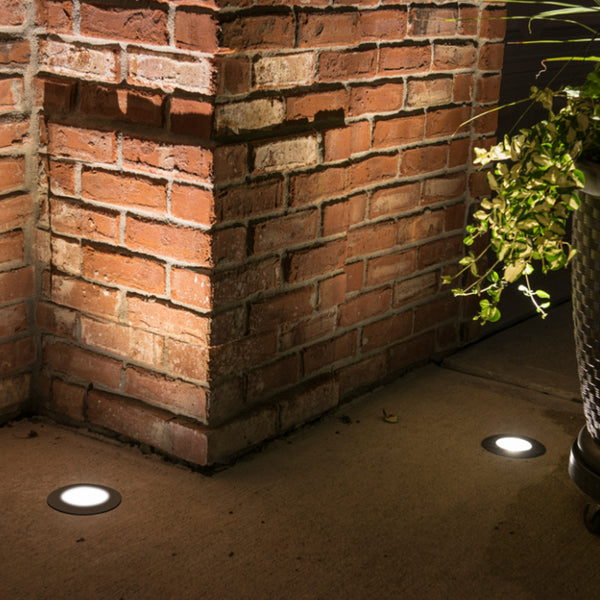
Understanding In-Ground Lights
In-ground lights, also known as recessed lights or well lights, are lighting fixtures that are installed flush with the ground. They come in various types, including LED, halogen, and solar-powered options, each offering unique benefits. These lights can be effectively used in numerous locations within your outdoor area, such as along pathways to guide guests safely, in gardens to highlight beautiful plants, or around patios to create a warm and inviting ambiance. Their versatility makes them a popular choice for homeowners looking to enhance their outdoor spaces.
Planning Your Installation
Before diving into the installation process, careful planning is essential. Start by assessing your outdoor space to determine where you want to place the lights. Consider factors such as the layout of pathways, existing landscaping, and the overall design you wish to achieve. It's also crucial to decide how many lights you will need; this can typically be determined by the length of the area to be illuminated and the spacing of the lights. A good rule of thumb is to space them about six to eight feet apart for optimal coverage. Once you have a plan, you can confidently move forward with the installation.
Gathering Necessary Tools and Materials
Preparation is key to a successful installation. Gather all the necessary tools and materials before you begin. Essential items include a shovel for digging, wiring suitable for outdoor use, connectors for securing the lights to the wiring, and the lights themselves. Additionally, a level will help ensure that your lights are installed evenly. Having everything ready at your fingertips will streamline the installation process and minimize interruptions.
Step-by-Step Installation Process
Now that you have your plan and materials ready, it’s time to dive into the installation process. Follow these steps to ensure a successful and safe installation:
Step 1: Marking the Installation Area
Begin by marking the spots for each light according to your plan. Use stakes and string or spray paint to outline where each light will sit. It's important to maintain consistent spacing to create an even and aesthetically pleasing look. This step helps visualize the layout and makes it easier to dig the holes later.
Step 2: Digging the Holes
Next, use a shovel to dig holes at the marked spots. The depth and width of the holes should accommodate the size of the lights and the necessary wiring. A depth of about 6 to 12 inches is usually adequate, depending on the light fixtures you are using. Ensure that the sides of the holes are even to help with the installation later.
Step 3: Wiring the Lights
Once the holes are dug, it’s time to run the wiring. Carefully lay the wiring in the trenches leading to each light. Be sure to follow local electrical codes and safety standards. Connect the wiring to the lights according to the manufacturer's instructions, ensuring that all connections are secure and protected from moisture.
Step 4: Installing the Lights
With the wiring in place, it’s time to install the lights. Place each light into its respective hole, ensuring that it sits flush with the ground. Use the provided screws or brackets to secure them properly. Make sure that the lights are level and positioned as desired before backfilling the holes with soil.
Step 5: Testing the Lights
Before finishing up, it’s essential to test the lights. Turn on the power and check each fixture to ensure they are working correctly. If any lights do not illuminate, double-check your wiring connections and troubleshoot as necessary. Once everything is functioning properly, you can finish backfilling the holes and tidy up the installation area.
Final Touches and Maintenance Tips
After installation, take a moment to make any final adjustments to the lights, such as angling them for optimal illumination. To keep your in-ground lights in great condition over time, regular maintenance is important. Clean the fixtures periodically to remove dirt and debris, and inspect the wiring for any signs of wear. This will help ensure that your lights continue to shine bright for years to come.
Enhancing Your Outdoor Space with In-Ground Lights
Installing in-ground lights can significantly enhance the beauty and safety of your outdoor space. By following the steps outlined in this guide, you can enjoy the satisfaction of a successful DIY project that transforms your yard into a beautifully illuminated oasis. Embrace your newly lit outdoor space and enjoy delightful evenings under the stars, knowing you’ve created a welcoming environment for friends and family.